

Quick Summary (TL;DR)
Most double glazing installations in the UK take between 1 and 7 days depending on property size. A small 1–2 bedroom flat with 4–6 windows typically completes in 1–2 days, a mid-sized 3–4 bedroom home with 8–12 windows takes 2–3 days, and a large 4+ bedroom detached house with 15 or more windows requires 4–7 days. The full process follows seven stages: home survey and measurement, removal of existing windows, opening preparation and repair, new frame installation, glazing, sealing and weatherproofing, and final inspection. Each individual window takes roughly 2–3 hours from removal to completion. Factors that affect timing include weather conditions, upper-floor scaffolding requirements, frame type (uPVC, timber, or aluminium), and the complexity of window designs. Sealants need 24–48 hours to fully cure before decorating. Always use a FENSA-registered installer to ensure Building Regulations compliance and proper certification for future property sales.
Recommendation: Request a free home survey to get an accurate installation timeline for your property, confirm frame and glazing options, and receive a no-obligation quote from a FENSA-registered, Which? Trusted Trader-accredited installer.
When you’re planning to upgrade your home with new double glazed windows and doors, one of the most pressing questions is naturally about timing. Understanding how long does it take to install double glazed windows and doors isn’t just about scheduling convenience – it’s about minimizing disruption to your daily life, planning around work commitments, and ensuring your home remains secure and weatherproof throughout the process.
The double glazing installation time UK homeowners experience can vary significantly depending on property size, the number of units being replaced, and various external factors. However, being well-informed about the window fitting process helps you prepare your home properly, coordinate with installers effectively, and set realistic expectations for your household. Whether you’re replacing a single window or undertaking a full-house transformation, knowing what to expect at each stage reduces stress and helps the project run smoothly.
This comprehensive guide walks you through every aspect of the installation timeline, from the initial survey to the final inspection. You’ll learn how to prepare your property, understand what happens during each installation stage, and discover how long different project sizes typically take. With proper preparation and understanding, you can ensure your double glazing installation is completed efficiently while maintaining your home’s comfort and security.
What Affects Installation Time
Before diving into specific timelines, it’s important to recognize that several factors influence how quickly your double glazing project can be completed. The size of your property plays a significant role – a two-bedroom flat will naturally require less time than a four-bedroom detached house. The type of frames being installed (uPVC, timber, or aluminum) also affects the process, as does the complexity of your window designs.
Weather conditions are particularly relevant in the UK climate. Rain, strong winds, or extreme cold can delay external work and affect sealant curing times. The accessibility of your windows matters too – ground floor installations proceed faster than upper floor work requiring scaffolding. Additionally, whether you’re considering planning permission for replacing double glazed windows can add weeks or even months to your overall timeline, though most like-for-like replacements fall under permitted development rights.
Understanding these variables helps you work with your installer to create a realistic schedule that accounts for your specific circumstances.
Required Tools, Materials, and Prerequisites
A successful double glazing installation depends on having the right expertise, equipment, and preparation in place before work begins. Understanding what professional installers bring to your project and how you should prepare your property ensures the work proceeds smoothly and efficiently. This section covers the essential qualifications your installer should possess, the specialized tools and materials required for proper installation, and the crucial steps you need to take to ready your home for the installation team’s arrival.
Installer Qualifications and Certifications
Professional double glazing installation requires specific expertise and certifications. Your installer should be FENSA registered (Fenestration Self-Assessment Scheme) or certified through an equivalent competent person scheme like CERTASS. These certifications ensure the work complies with Building Regulations and provides you with the necessary compliance certificates for your property records.
Reputable installers carry public liability insurance and provide comprehensive warranties covering both materials and workmanship. Before work begins, verify these credentials and ensure you receive written confirmation of warranty terms. This protects you legally and financially should any issues arise post-installation.
Essential Tools and Equipment
While homeowners don’t need to provide tools, understanding what professionals use gives insight into the process. Installation teams arrive with specialized equipment including:
- Power drills and screwdrivers for frame fixing
- Spirit levels and plumb lines for precise alignment
- Silicone guns and sealant application tools
- Packers and shims for frame adjustment
- Measuring devices and cutting equipment
- Safety equipment including dust sheets and protective gear
For upper floor installations, external scaffolding or mobile elevated work platforms may be necessary, adding both time and cost to the project.
Materials Checklist
The installation involves more than just windows and doors. Your installer provides:
- Double glazed units (glass sealed units)
- Window or door frames (uPVC, timber, or aluminum)
- Internal and external sealants and weatherproofing materials
- Fixing screws, brackets, and hardware
- Handles, locks, and security features
- Internal trims and finishing materials
Quality materials significantly impact both installation time and long-term performance. When researching options, you might wonder are composite doors with double glazing worth it – the answer often depends on your security requirements and aesthetic preferences, though both options offer excellent thermal performance.
Property Readiness Requirements
Preparing your home before installation day accelerates the process considerably. Clear the area around each window and door, removing curtains, blinds, furniture, and ornaments from windowsills. External access paths should be cleared, and any obstacles near exterior walls removed.
Inside, protect flooring with dust sheets in the work areas. If you have valuable items or delicate electronics nearby, relocate them to another room. Inform your installer about any specific concerns, such as alarm systems connected to window sensors or broadband cables running along window frames.
Pets should be secured away from work areas for their safety and to prevent interruptions. If possible, arrange for children to be elsewhere during installation, as noise and open windows create safety concerns.
Step-by-Step Window Fitting Process
The window fitting process involves seven distinct stages, each critical to ensuring your new double glazed windows and doors perform optimally for decades to come. From the initial measurements taken weeks before installation to the final quality checks on completion day, every step requires precision, expertise, and attention to detail. Understanding what happens at each stage helps you appreciate the craftsmanship involved, recognize quality workmanship, and know what to expect as installers transform your home. This comprehensive walkthrough takes you through each phase of the installation, explaining the purpose, duration, and importance of every step along the way.
Stage 1: Initial Home Survey and Measurement
The installation timeline actually begins weeks before fitting day with a professional survey. During this 30-60 minute visit, a surveyor measures every window and door opening precisely, assesses the condition of existing frames and surrounding structures, and identifies any potential complications.
The surveyor checks for structural issues, examines wall cavities, and determines the best fixing methods for your property type. They discuss glass specifications, frame colors, opening styles, and hardware options with you. This information is crucial for manufacturing windows to exact specifications – even millimeter-level accuracy matters for proper fit and thermal performance.
This survey typically occurs 2-4 weeks before installation, allowing time for bespoke manufacturing. The surveyor provides a detailed quote and confirms lead times, which currently average 4-6 weeks for most UK suppliers, though this varies seasonally.
Stage 2: Removal of Existing Windows and Doors
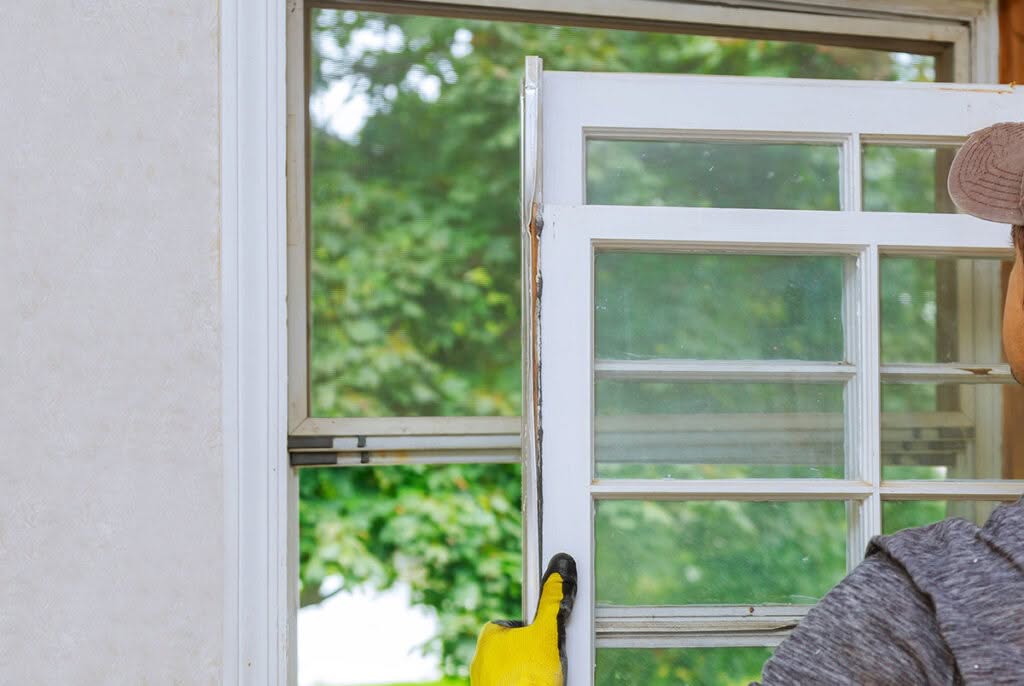
On installation day, the Cristal Windows team begins by protecting your interior with dust sheets and setting up external work areas. The removal process starts from the inside, with our installers first removing window accessories (handles and locks), then carefully detaching glazing beads to remove the glass units safely.
For uPVC or aluminum frames, Cristal Windows installers cut through or unscrew the frame from the wall at strategic points, then lever it out carefully to avoid damaging the surrounding masonry. Timber frames may require more careful removal, especially in older properties where they might be painted into the opening.
Each window removal typically takes 15-30 minutes, depending on size and complexity. During this phase, your home is temporarily exposed to the elements, so our installers work efficiently and usually tackle one window at a time to maintain security and minimize drafts.
Debris is removed immediately, and openings are checked for damage or deterioration requiring repair before new frames are fitted.
Stage 3: Opening Preparation and Repair
With old frames removed, Cristal Windows installers inspect and prepare the openings. This critical stage ensures new windows perform optimally and meet Building Regulations. The masonry is cleaned of old sealant, mortar, and debris. Any damaged brickwork or rendering is repaired, and openings are checked for level and square alignment.
The window board (internal sill) area is prepared, and any rotten timber or deteriorated materials are replaced. DPC (damp-proof course) trays may be installed at the head of the opening to direct any moisture outward if required for your specific installation.
This preparation stage takes 20-45 minutes per opening and directly impacts the quality and longevity of your installation. Rushing this stage leads to future problems with drafts, condensation, or water ingress.
Stage 4: New Frame Installation and Fixing
New frames arrive pre-manufactured to exact specifications. Before positioning, Cristal Windows installers apply weatherproof membrane or DPC around the opening perimeter. The frame is then carefully lifted into position – larger windows requiring two or more installers.
Using packers and shims, the frame is precisely leveled both horizontally and vertically. Spirit levels and plumb lines ensure perfect alignment, as even slight deviations cause operational issues with opening windows and affect weatherproofing.
Once aligned, the frame is secured using specialized frame fixers screwed through the frame into the masonry or timber structure. Fixing positions are strategic, typically every 300-600 mm around the perimeter and always near corners and opening hardware locations. For heavy doors, additional floor fixings provide stability.
The frame installation and fixing process takes 30-60 minutes per window, longer for large patio or French doors. Throughout this stage, our installers continuously check alignment, adjusting packers as needed.
Stage 5: Glazing Installation
With frames securely fixed, double glazed units are installed. Modern units are substantial – a typical window might weigh 20-40kg – requiring careful handling. Cristal Windows installers apply setting blocks at the base of the frame to support the glass weight correctly, then position the sealed unit into the frame rebate.
Glazing packers ensure proper spacing around the entire unit perimeter, preventing glass-to-frame contact while maintaining weatherproofing. Glazing beads are then clipped or screwed into place, securing the glass and creating compression seals.
For windows with Georgian bars, leaded designs, or decorative glazing, additional time is needed to ensure patterns align correctly. Obscured glass for bathrooms must be oriented properly.
Each glazing unit installation takes 15-25 minutes. The glass should sit securely without rattles, and equal spacer gaps should be visible all around – indicating correct installation and proper thermal performance.
Stage 6: Sealing, Weatherproofing, and Finishing
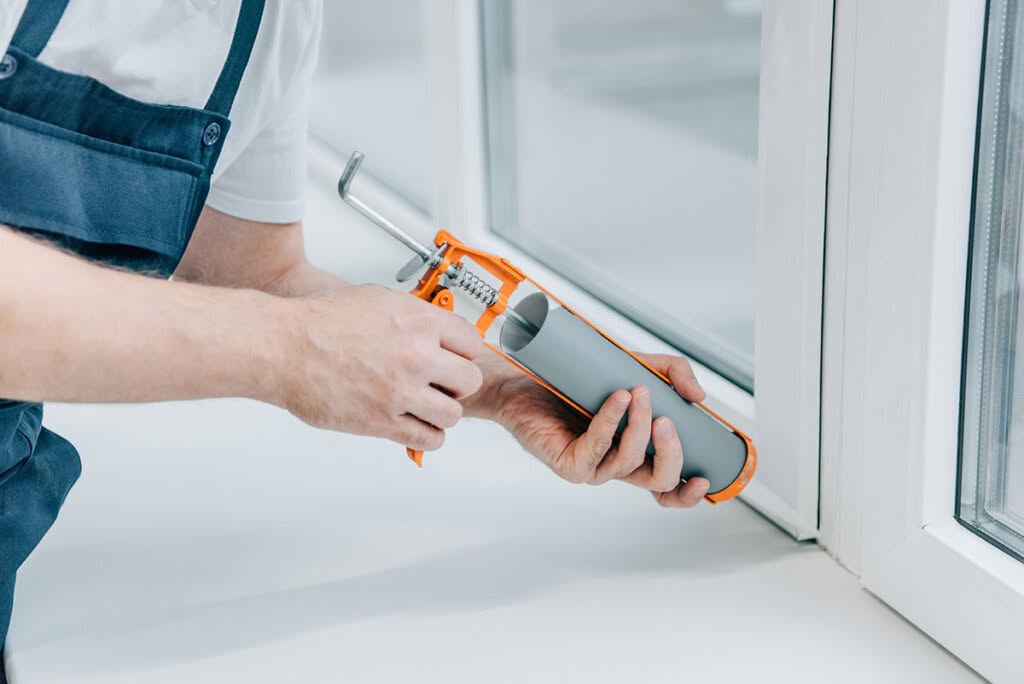
Comprehensive sealing is crucial for weatherproofing and thermal efficiency. Cristal Windows installers apply external-grade silicone sealant around the entire frame perimeter where it meets the masonry. This seal must be continuous and properly tooled (smoothed) to shed water effectively.
Internal gaps between the frame and wall are filled with expanding foam or mineral wool insulation, preventing drafts and cold bridging. Once the foam cures (typically 1-2 hours), excess is trimmed back flush with the frame.
Internal sealant is then applied around the frame where it meets the interior wall, creating an airtight seal. For aesthetic finishes, our installers may fit internal trims, architraves, or window boards, though sometimes this finishing work is left for decorators.
Hardware installation completes this stage – handles, locks, restrictors, and trickle vents are fitted and adjusted. All opening windows and doors are tested to ensure smooth operation, correct locking, and proper weathersealing.
Sealing and finishing each window takes 20-40 minutes, with sealant requiring 24-48 hours to fully cure before painting or final exposure to harsh weather.
Stage 7: Final Inspection and Testing
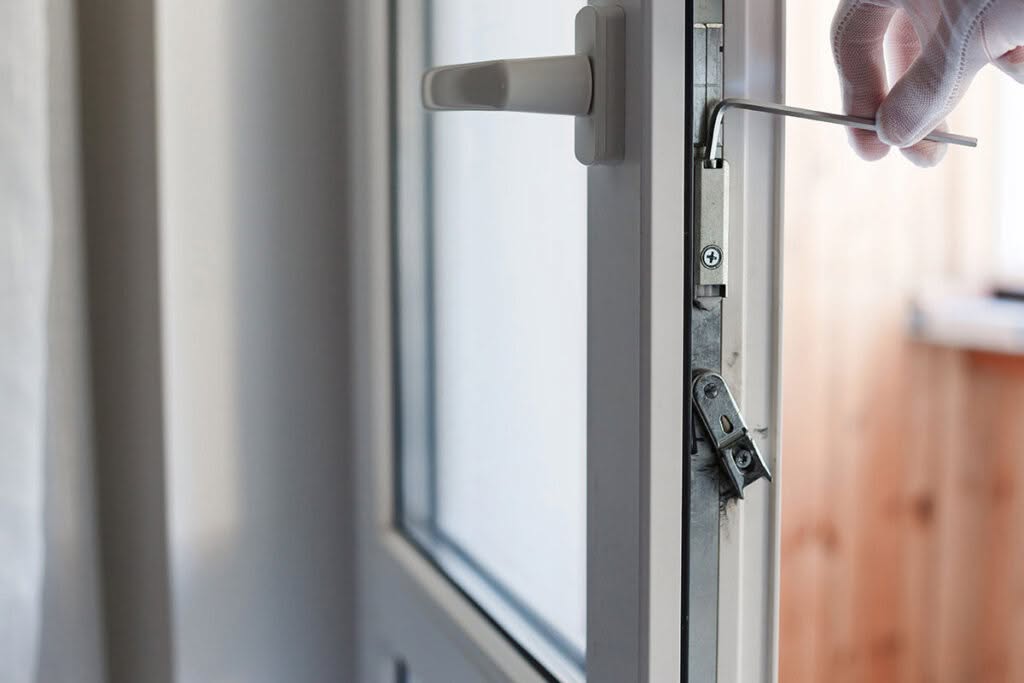
Before declaring the job complete, Cristal Windows installers conduct thorough checks. Every opening window and door is operated multiple times, testing locks, handles, and hinges. They verify that multipoint locking systems engage fully and restrictors function correctly.
Visual inspection confirms sealant continuity, proper frame alignment, and glazing bead seating. Our installers check for any gaps, adjustment issues, or cosmetic damage requiring attention.
You should be walked through the operation of each window and door, shown how locks and restrictors work, and advised on maintenance requirements. We provide written care instructions and warranty documentation.
The site is cleaned, with all debris removed and dust sheets taken away. Your FENSA or equivalent certification documents should be provided within weeks, along with warranty information.
This final stage takes 15-30 minutes and provides peace of mind that your installation meets professional standards.
Installation Timeline Breakdown by Property Size
One of the most practical questions homeowners ask is exactly how long their specific property will take to complete. While every installation has unique factors, property size remains the primary determinant of overall project duration. The number of windows and doors, the need for scaffolding or access equipment, and the complexity of individual units all scale with property size. This section provides realistic timeline expectations for small, medium, and large UK properties, breaking down the work into daily schedules so you can plan your life around the installation with confidence and minimal disruption.
Small UK Properties (1-2 Bedrooms, Flats)
For compact properties typically featuring 4-6 windows and one external door, double glazing installation is relatively swift. The entire project generally completes in 1-2 days depending on complexity.
- Day 1 (6-8 hours): All windows and the door can usually be removed, new frames fitted, glazed, and sealed in a single working day if conditions are favorable. A two-person installation team works systematically through the property, completing one room before moving to the next.
- Day 2 (2-4 hours): If required, this day involves finishing touches, final sealing, adjustments, and thorough cleaning. Some companies complete everything in one extended day for smaller properties.
For a typical two-bedroom flat, expect your home to have open windows for no more than 30-45 minutes per window as installers work room by room, maintaining security and weatherproofing throughout.
Medium UK Properties (3-4 Bedrooms, Semi-Detached or Terraced)
Medium-sized homes with 8-12 windows, plus front and back doors, require more comprehensive scheduling. Full installation typically spans 2-3 days with a two to three-person team.
- Day 1 (7-8 hours): The team tackles the ground floor, removing and replacing windows in living areas, kitchen, and one external door. This prioritizes securing the most accessible entry points.
- Day 2 (7-8 hours): Upper floor windows are completed, along with any remaining ground floor units and the second external door. If scaffolding is required, it should be erected before this day begins.
- Day 3 (4-6 hours): Final adjustments, comprehensive sealing work, trim installation, and detailed cleaning. All hardware is fine-tuned, and final quality checks completed.
Properties requiring scaffolding for upper floors add extra time for setup (typically half a day) and removal (2-3 hours after installation completes).
Large UK Properties (4+ Bedrooms, Detached Houses)
Substantial homes with 15+ windows, multiple doors, and possibly conservatory or bi-fold door systems require extended timelines. Full house installations typically take 4-7 days depending on the exact number of units and complexity.
- Days 1-2: Ground floor windows and doors, working systematically through each room.
- Days 3-4: Upper floor installations, with scaffolding allowing safe external access.
- Days 5-6: Complex units like large bay windows, bi-fold doors, or French door sets requiring careful alignment and multiple glazing units.
- Day 7: Comprehensive finishing, sealing, adjustment, and quality assurance across the entire property.
Larger installations may involve multiple teams working simultaneously in different areas to maintain efficient progress while minimizing disruption.
For all property sizes, these timelines assume favorable weather conditions and no unexpected complications. Always add contingency time when planning around the installation.
Troubleshooting Common Installation Issues
Even with experienced installers and thorough preparation, certain challenges can arise during double glazing installation that extend timelines or require problem-solving on the spot. Being aware of these common issues, their causes, and their solutions helps you maintain realistic expectations and respond appropriately when complications occur. Understanding whether a delay is a normal part of professional installation or a red flag requiring attention protects your investment and ensures quality results. This section examines the most frequent installation challenges UK homeowners encounter, from unpredictable weather to technical fitting problems, and provides practical guidance on resolution and prevention.
Weather-Related Delays
The British climate presents unique challenges for double glazing installation time UK homeowners must consider. Rain, strong winds, and freezing temperatures can halt work unexpectedly.
Problem: Sudden rain during installation leaves openings exposed and prevents external sealant application.
Solution: Professional installers monitor weather forecasts closely and carry temporary weatherproofing materials. They can secure openings with plastic sheeting and return when conditions improve. External sealant requires dry conditions and temperatures above 5°C for proper curing. If weather forces delays, Cristal Windows installers prioritize making your home secure and weatherproof temporarily, returning to complete finishing work when appropriate.
Prevention: Schedule installations during traditionally drier months (May-September in most UK regions). Accept that even with planning, British weather may extend your project by 1-2 days.
Frame Alignment and Fitting Problems
Problem: New frames don’t fit squarely into openings, causing operational issues, gaps, or excessive force required to close windows.
Solution: This issue typically arises from inaccurate initial measurements or settlement in older properties. Experienced Cristal Windows installers carry various packer sizes and adjustment shims to accommodate minor variations. They’ll spend additional time carefully leveling and squaring frames, checking diagonal measurements to ensure perfect rectangular geometry.
For significant discrepancies, frames may need returning to the manufacturer for modification, delaying installation by 2-4 weeks. This is rare with professional surveys but can occur in historic properties with non-standard openings.
Prevention: Ensure your initial survey is conducted by experienced surveyors who take multiple measurements and account for any irregularities. In older properties, explicitly discuss potential fitting challenges upfront.
Sealant Curing Time Complications
Problem: Internal decoration or final touches delayed because sealant hasn’t fully cured, remaining tacky or vulnerable to damage.
Solution: Modern silicone sealants typically skin over in 30-60 minutes but require 24-48 hours for complete curing. Rushing this process by painting over or disturbing uncured sealant compromises weatherproofing and adhesion.
If you’re eager to redecorate, discuss fast-cure sealant options with your Cristal Windows installer. Some professional-grade products cure faster, though they may cost slightly more.
Prevention: Plan decoration work for at least 48 hours after installation completion. Avoid touching or cleaning sealant areas for the full curing period. Maintain reasonable indoor temperatures (15-20°C) to optimize curing – cold rooms significantly slow the process.
Damage to Surrounding Decoration
Problem: Removal of old windows damages paint, wallpaper, or plaster around openings, requiring unexpected repair work.
Solution: Some decorative damage is almost inevitable, particularly with older installations where frames were heavily sealed or painted in place. Cristal Windows installers work carefully to minimize damage and should discuss expectations during the survey.
Minor plaster chips can be filled and touched up quickly. More extensive damage to wallpaper or decorative plasterwork requires additional trades, potentially adding days or weeks to achieving a finished appearance.
Prevention: Accept that some redecoration around new windows is normal. Factor this into your project timeline and budget. Clear communication with our installers about your expectations regarding decoration helps avoid disappointment.
Operational Issues After Installation
Problem: New windows or doors stick, won’t lock properly, or have drafts despite recent installation.
Solution: Most operational issues arise from minor adjustment needs. Modern uPVC and aluminum systems have multiple adjustment points allowing Cristal Windows installers to fine-tune operation. Contact us immediately – we provide adjustment visits within our warranty terms.
Drafts usually indicate incomplete sealing or foam gaps. These should be addressed promptly as they affect thermal performance and energy bills.
Prevention: Test all windows and doors thoroughly during the final inspection with your Cristal Windows installer present. Operate them multiple times, check locks engage fully, and feel for drafts around closed units. Addressing issues before the installation team leaves prevents return visit delays.
Post-Installation Care and Next Steps
The completion of installation isn’t the end of your double glazing journey – it’s the beginning of years of improved comfort, energy efficiency, and security. How you care for your new windows and doors in the critical first days and ongoing months significantly impacts their performance and longevity. Knowing what maintenance tasks to perform, when to contact your installer about concerns, and how to understand your warranty and certification documents ensures you maximize your investment. This section guides you through essential aftercare procedures, long-term maintenance practices, and the important administrative aspects of your installation that protect both your property value and your legal position.
Immediate Aftercare (First 48 Hours)
The first two days after installation are crucial for optimal performance. Avoid opening newly installed windows unnecessarily while sealants cure fully. Keep internal temperatures stable – avoid drastic heating changes that can stress fresh seals.
Clean glass using only soft cloths and plain water for the first week. Avoid harsh chemicals near fresh sealant. If you notice any minor gaps or issues, photograph them and contact Cristal Windows rather than attempting DIY fixes that might void warranties.
Check around each window for any missed debris or dust, vacuuming areas gently. Wipe down frames with a damp cloth to remove installation residue.
Long-Term Maintenance Requirements
Double glazed windows and doors are remarkably low maintenance but benefit from simple regular care. Clean frames with warm soapy water every few months, avoiding abrasive cleaners that damage finishes. For uPVC frames, specialized cream cleaners restore appearance without scratching.
Lubricate moving parts annually – hinges, locks, and handles – with light machine oil or specialist window lubricant. This prevents stiffness and extends hardware life. IMPORTANT: Never use WD40 on any moving parts. WD40 is a release agent, not a lubricant, and its use can invalidate your warranty. Check and clear drainage slots (small openings at the bottom of frames) to prevent water accumulation.
Inspect external sealant annually for any cracks or gaps, particularly after harsh winters. Minor sealant repairs are simple DIY tasks preventing larger problems.
When to Contact Your Installer
Most installation issues manifest quickly. Contact us immediately if you notice:
- Condensation between glass panes (indicates seal failure)
- Drafts around closed windows
- Difficulty operating opening windows
- Water ingress during rain
- Locks not engaging properly
- Visible gaps in sealant or frame fit
Currently, warranties are up to 10 years and will be outlined in your contract with us on specific elements. Keep all documentation safely – you’ll need it for warranty claims.
Don’t delay reporting issues. Small problems addressed promptly prevent larger, more expensive complications.
Understanding Your Certification
Within 4-6 weeks of installation completion, you should receive Building Regulations compliance certification (FENSA certificate or equivalent). This document is crucial – it proves your installation meets current regulations and is required when selling your property.
Store this certificate with your property deeds. If you don’t receive it within the stated timeframe, contact Cristal Windows immediately. Without proper certification, you may face complications during property sales or mortgage applications.
Conclusion: Planning Your Installation Success
Understanding how long does it take to install double glazed windows and doors empowers you to plan effectively, minimize disruption, and achieve the best results from your investment. While typical installations range from one day for small properties to a week for large homes, the exact timeline depends on your specific circumstances.
The key to smooth installation lies in choosing qualified installers, preparing your property thoroughly, and maintaining realistic expectations about the window fitting process. Weather delays, minor fitting adjustments, and sealant curing times are normal aspects of professional installation – not indicators of poor workmanship.
By following the guidance in this article, you’re well-equipped to coordinate with the Cristal Windows installation team, understand each stage as it unfolds, and ensure your new double glazed windows and doors deliver decades of comfort, security, and energy efficiency.
Remember that while the installation itself is relatively brief, the benefits – reduced energy bills, enhanced security, noise reduction, and improved property value – last for many years. The temporary disruption is a small price for such substantial long-term gains.
For personalized timeline estimates and professional advice tailored to your property, consult with your FENSA-registered installer Cristal Windows who can survey your home and provide detailed scheduling information. With proper planning and realistic expectations, your double glazing installation can proceed smoothly, transforming your home with minimal stress and maximum efficiency.